Welcome to joymelife! Today, we’re embarking on a delicious adventure to prove that a high-powered blender is not a prerequisite for milkshake nirvana. This comprehensive guide will arm you with ingenious methods, practical tips, and troubleshooting advice to craft an amazing milkshake without a blender. We’ll explore techniques using common kitchen tools you almost certainly have on hand. So, say goodbye to milkshake deprivation and hello to creamy, dreamy, homemade goodness, no fancy machinery required!
The No-Blender Milkshake Quest: Can It Really Be Done? (Spoiler: Yes!)
The core of a milkshake is simple: ice cream, milk, and flavorings, combined into a sippable, creamy consistency. While a blender achieves this through high-speed pulverization and aeration, we can mimic these effects with a bit of ingenuity and elbow grease.
- What to Expect: Be realistic. A hand-shaken or whisked milkshake might not achieve the exact same ultra-smooth, aerated fluffiness of a high-powered commercial blender, especially if you’re incorporating chunky add-ins. However, you can absolutely create a milkshake that is incredibly creamy, thoroughly combined, and utterly delicious. The key is managing your ingredients and choosing the right technique.
Why This Guide is Your Secret Weapon for Blender-Free Bliss
This isn’t just a list of hacks; it’s your complete manual for no-blender success:
- Proven Methods: We detail the most effective techniques, from the vigorous shaker method to gentle whisking.
- Ingredient Wisdom: Learn which ingredients work best when you’re going low-tech.
- Troubleshooting Mastery: Our dedicated guide will help you fix common no-blender milkshake challenges.
- Flavor Freedom: Discover simple “recipes” and inspiration for creating your favorite flavors.
The Building Blocks: Key Ingredients for No-Blender Milkshake Success
When you’re making a milkshake without a blender, the state and type of your ingredients are even more critical.
The Star of the Show: Ice Cream – Softness is Your Ally
This is non-negotiable. Your ice cream needs to be softened significantly.
- Why Soften? Trying to break down rock-hard ice cream by hand is an exercise in frustration. Softened ice cream will combine much more easily with milk and other ingredients, yielding a creamier result with less effort.
- How to Soften: Let the ice cream sit at room temperature for 10-15 minutes (depending on how warm your kitchen is) until it’s easily scoopable and has a slightly melty consistency around the edges, but not completely liquid. You can also microwave it for very short bursts (5-10 seconds), checking frequently, but be careful not to melt it too much.
The Liquid Component: Milk & Its Role in Texture
Milk helps to thin the ice cream to a drinkable consistency.
- Whole Milk: Generally preferred for the richest flavor and creamiest no-blender result.
- Other Milks (2%, Skim, Plant-Based): Will also work, but the shake might be slightly less rich. Adjust quantities as needed.
- Start Small: Begin with a smaller amount of milk; you can always add more if your shake is too thick.
Flavor Powerhouses: Syrups, Powders, and Soft Fruits
Without a blender to pulverize, choose flavorings that integrate easily:
- Syrups (Chocolate, Strawberry, Caramel, Vanilla): These stir in effortlessly.
- Powders (Cocoa, Malted Milk, Instant Coffee): Whisk or shake these thoroughly with a bit of the milk first to prevent clumps before adding the ice cream.
- Soft, Mashable Fruits: Very ripe bananas are perfect. Berries can be muddled or mashed first. Avoid hard, fibrous fruits unless you’re content with a chunkier result or plan to strain.
Your No-Blender Arsenal: Top Methods for Crafting Creamy Shakes
Here are the most effective ways to achieve milkshake glory, no blender required!
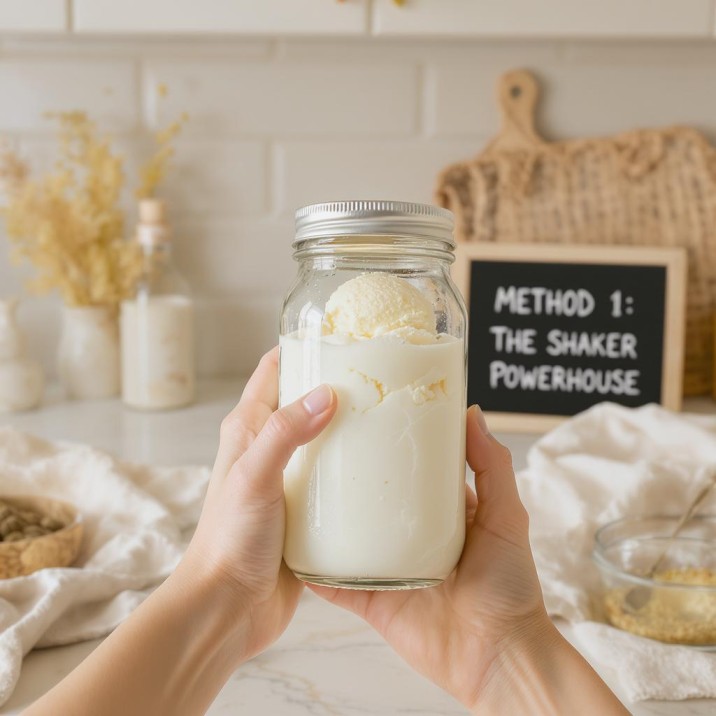
Method 1: The Shaker Powerhouse (Mason Jar or Protein Shaker)
This is arguably the most popular and effective no-blender method for classic milkshakes.
- What You’ll Need: A large mason jar with a tight-fitting lid, or a protein shaker bottle (preferably with a whisk ball).
- Pros: Creates good aeration, relatively quick, minimal cleanup.
- Cons: Best for smoother milkshakes without large chunks of fruit unless the fruit is pre-mashed.
Step-by-Step: Shaking Your Way to a Milkshake
- Soften Ice Cream: Let your ice cream soften at room temperature for 10-15 minutes.
- Add Ingredients: Scoop 2-3 generous scoops of softened ice cream into your shaker or jar. Add ¼ to ⅓ cup of milk and any liquid flavorings (like chocolate syrup or vanilla extract). If using powders, pre-mix them with a little of the milk.
- Seal Tightly: Ensure the lid is screwed on VERY securely. This is crucial to avoid a milkshake explosion!
- Shake Vigorously: Hold the jar/shaker with both hands and shake it as hard as you can for 1-2 minutes. You want to shake up and down, side to side, and even in circular motions. The goal is to break up the ice cream and incorporate air.
- Check & Adjust: Open carefully. Check the consistency. If it’s too thick, add another tablespoon of milk, reseal, and shake again.
- Serve Immediately: Pour into a chilled glass and enjoy!

Method 2: The Whisking Wizardry (Bowl & Hand Whisk)
This method requires a bit more patience but can yield a beautifully smooth and slightly lighter texture.
- What You’ll Need: A sturdy bowl (preferably chilled) and a good quality balloon whisk.
- Pros: Allows for more control over incorporating ingredients, can handle slightly more delicate additions.
- Cons: More arm work, might not get as thick as the shaker method.
Step-by-Step: Whisking Up a Frothy Delight
- Soften Ice Cream: As above, let the ice cream soften.
- Combine in Bowl: Place the softened ice cream in the chilled bowl. Add your milk and any flavorings.
- Whisk Briskly: Start whisking slowly to combine, then increase your speed. Whisk vigorously for 2-3 minutes, moving the whisk in all directions to break down the ice cream and incorporate air.
- Scrape and Continue: Scrape down the sides of the bowl occasionally. Continue whisking until the milkshake is smooth and has reached your desired consistency.
- Serve: Pour into a chilled glass.
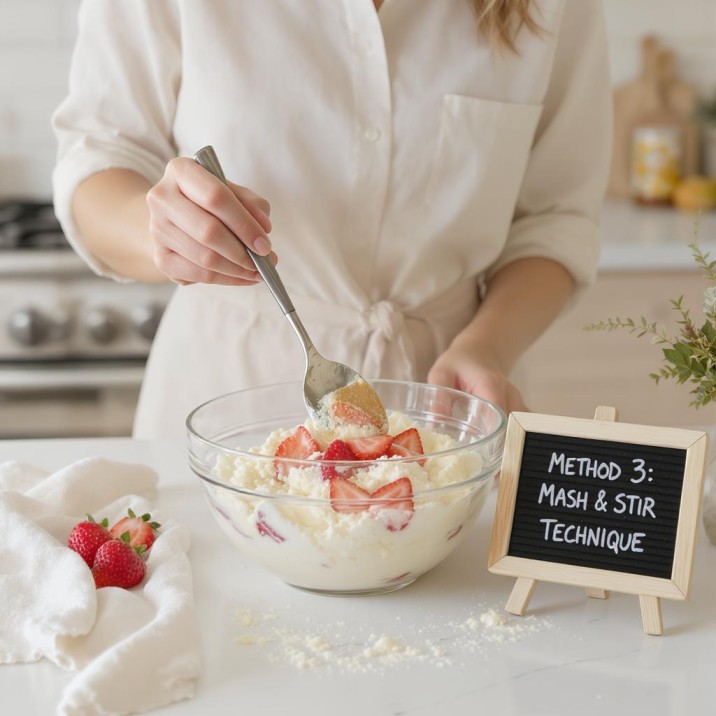
Method 3: The Mash & Stir Technique (Perfect for Soft Fruit Additions)
This method is excellent if you want to incorporate soft fruits like very ripe bananas or berries.
- What You’ll Need: A sturdy bowl, a fork (for mashing), and a spoon or spatula (for stirring).
- Pros: Best way to integrate soft fruit pieces for a more rustic, flavorful shake.
- Cons: Won’t be as smooth as the other methods if fruit isn’t thoroughly mashed; less aeration.
Step-by-Step: Mashing Fruits for Flavorful Integration
- Mash Fruit: In the bowl, thoroughly mash your very ripe banana or berries with a fork until almost pureed.
- Soften Ice Cream: Let your ice cream soften.
- Combine & Stir: Add the softened ice cream to the mashed fruit. Pour in your milk and any other flavorings. Stir vigorously with a spoon or spatula, pressing and smearing the ice cream against the side of the bowl to help it break down and combine with the fruit and milk.
- Continue Stirring: Stir for 2-3 minutes until it’s as smooth as you can get it and the ingredients are well combined.
- Serve: Enjoy this more rustic, fruit-forward shake.

Pro-Tips for Achieving Maximum Creaminess & Flavor (Sans Blender)
- Pre-Chill Everything: A chilled jar/bowl, chilled milk, and even chilled flavorings will help keep the ice cream from melting too quickly.
- Work Fast: Once your ice cream is softened, assemble and shake/whisk your milkshake quickly to prevent it from becoming too liquid.
- Use Quality Ingredients: Good ice cream and fresh milk make a noticeable difference.
- For Richness: Use whole milk. For an extra decadent treat, a splash of heavy cream or half-and-half can be added (use less milk if you do).
- Don’t Be Afraid of a Few Lumps: Especially with the mash & stir method, a few tiny fruit bits can be pleasant. Perfection is in the taste!
Common No-Blender Milkshake Challenges & Bright Solutions (Troubleshooting Guide)
| No-Blender Milkshake Challenge | Probable Cause(s) | The Bright Solution(s) |
|---|---|---|
| Milkshake is Too Lumpy / Chunky | Ice cream wasn’t soft enough; not shaken/whisked vigorously or long enough; fruit pieces too large. | Ensure ice cream is well-softened. Increase shaking/whisking time and intensity. Mash fruit very thoroughly beforehand. |
| Milkshake is Too Thin / Watery | Ice cream too melted; too much milk added. | Use colder, slightly less softened ice cream. Start with less milk and add gradually. Pop it in the freezer for 5-10 mins to firm up. |
| Ingredients Aren’t Combining Well | Ice cream too hard; not enough initial liquid to get things moving. | Soften ice cream more. Ensure you have a base of milk for the ice cream to mix into. Shake/whisk with more force. |
| It’s Taking Too Long / Too Much Effort | Ice cream was too firm; using a less effective tool (e.g., a small fork instead of a whisk). | Patience with softening ice cream is key! Use a proper shaker or a good-sized balloon whisk for better results. |
| Flavor is Weak | Not enough flavoring syrup/powder; ice cream is bland. | Patience is key to softening ice cream. For better results, use a proper shaker or a good-sized balloon whisk. |
No-Blender Milkshake Flavor Inspirations & Simple “Recipes”
Use the shaker or whisk method for these classics. (Measurements are approximate for 1 serving).
Classic Vanilla, Chocolate, or Strawberry (Syrup Sensations)
- Ingredients: 3 scoops softened vanilla ice cream, ¼ cup milk, 2 tbsp chocolate, strawberry, or vanilla syrup.
- Method: Shake or whisk vigorously.
The Easiest Peanut Butter Banana Mash-Up
- Ingredients: ½ very ripe banana (mashed thoroughly), 2-3 scoops softened vanilla or chocolate ice cream, 2 tbsp creamy peanut butter, ¼ cup milk.
- Method: Best with the “Mash & Stir” method, or add pre-mashed banana and peanut butter to the shaker method.
Instant Coffee Kick Milkshake
- Ingredients: 1 tsp instant coffee powder dissolved in 1 tbsp warm milk (let cool), 3 scoops softened vanilla ice cream, ¼ cup additional cold milk.
- Method: Add cooled coffee mixture to shaker/bowl with other ingredients. Shake or whisk well.
Knowing the Limits: When a Blender Still Reigns Supreme
While no-blender methods are fantastic, it’s good to know their limitations:
- Hard Ingredients: Incorporating ice, hard frozen fruit chunks (that haven’t been softened), or fibrous greens like kale is very difficult without a blender.
- Ultra-Smooth Texture: A high-speed blender will always produce a slightly smoother, more aerated texture.
- Large Batches: Making milkshakes for a crowd without a blender can be quite an arm workout!

All Your No-Blender Milkshake Questions Answered (Expanded FAQ)
Q: Can I use a fork to make a milkshake if I don’t have a whisk or shaker?
A: You can try, especially if the ice cream is very soft and you’re not adding much. It will take a lot more effort to break down the ice cream and combine it smoothly. A fork is better for mashing fruit in the “Mash & Stir” method. A sturdy spoon for stirring is also better than a fork for the final mixing in that method.
Q: How long should I shake a mason jar milkshake?
A: Aim for at least 1-2 minutes of vigorous, continuous shaking. Your arms might get tired, but this ensures the ice cream breaks down and incorporates air for a creamier result.
Q: What’s the best way to clean a mason jar or shaker after making a milkshake?
A: Rinse it immediately with hot water after you’re done. This prevents the sugary, milky residue from drying and sticking. Then wash with soap and water.
Q: Can I make a thicker milkshake without a blender?
A: Yes! The key is to use very well-softened but still cold ice cream and start with minimal milk. You can always add a tiny bit more ice cream if it’s too thin. The shaker method tends to produce a slightly thicker result due to aeration.
Q: Are no-blender milkshakes suitable for kids to make?
A: The shaker method (with adult supervision for sealing the jar tightly!) can be a fun activity for older kids. The whisking and mashing methods are also manageable with some help.
Conclusion: Shake, Whisk, or Stir Your Way to Milkshake Happiness!
Craving a delicious, creamy milkshake doesn’t have to end in disappointment if a blender isn’t part of your kitchen arsenal. As we’ve explored, with a little know-how, the right approach to your ingredients, and some enthusiastic shaking or whisking, you can absolutely craft a satisfying milkshake without a blender. Whether you’re using a mason jar, a protein shaker, or a simple bowl and whisk, the joy of a homemade milkshake is accessible to everyone.
So, the next time that craving hits, remember these simple techniques. Embrace the low-tech charm, enjoy the process, and treat yourself to a well-deserved, hand-crafted delight. What no-blender milkshake flavor will you try first? Share your experiences and creative concoctions in the comments below! For more ingenious kitchen solutions and delicious recipes, keep exploring JoyMeLife.