
Published: September 14
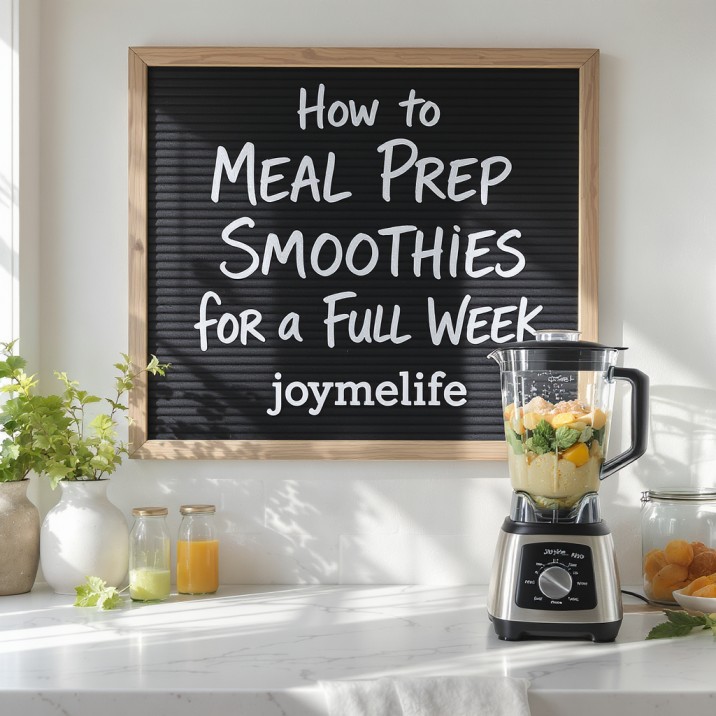
Welcome to joymelife! Today, we are solving this dilemma for good. This isn’t just a collection of tips; it’s your definitive masterclass on how to meal prep smoothies for a full week. We’ll explore the two primary, expert-approved methods, dive deep into the science of what works (and what doesn’t), equip you with prep-friendly recipes, and provide a comprehensive troubleshooting guide for any potential hiccups. By the end of this guide, you’ll be empowered to transform one hour on a Sunday into a full week of stress-free, delicious, and incredibly healthy breakfasts or snacks.

Why Smoothie Meal Prep is a Game-Changer
The benefits of a daily smoothie are well-known: a concentrated dose of fruits, vegetables, fiber, and nutrients. The challenge is consistency. Smoothie meal prep is the bridge between good intentions and a sustainable, healthy habit.
- Saves Precious Time: The biggest benefit. Your morning routine is reduced from a 10-15 minute chore to just a minute or two of blending or thawing.
- Reduces Food Waste: Use up your produce before it goes bad by portioning it into smoothie packs.
- Ensures Healthy Choices: When a healthy option is the easiest option, you’re far more likely to stick with it.
- Saves Money: Buying fresh ingredients in bulk and prepping them is far more cost-effective than daily trips to a smoothie bar.
Your Blueprint for a Stress-Free, Healthy Week (Our Promise)
This guide is designed to be your go-to resource for making smoothie prep a seamless part of your life:
- Clear Methods: We break down the two best strategies so you can choose the one that fits your lifestyle.
- Expert Techniques: Learn the small details that lead to the best taste and texture.
- Actionable Recipes: Get started immediately with five delicious, prep-friendly recipe ideas.
- Problem-Solving: Our dedicated troubleshooting guide ensures you can navigate any challenge with confidence.
Choosing Your Strategy: The Two Core Methods of Smoothie Meal Prep
There are two main schools of thought when it comes to prepping smoothies. Let’s break them down.
Method 1: Freezer Smoothie Packs (The “Ready-to-Blend” Approach)
This involves portioning all the solid smoothie ingredients (fruits, vegetables, seeds, powders) into individual bags or containers and freezing them. When you’re ready for a smoothie, you simply dump one pack into your blender, add your liquid, and blend.
Method 2: Pre-Blended Frozen Smoothies (The “Ready-to-Thaw” Approach)
This involves making a large batch of your smoothie, blending it completely, and then pouring it into individual containers to freeze. When you’re ready, you take one out to thaw.
Which Method is Right for You? A Quick Comparison
| Feature | Method 1: Freezer Packs | Method 2: Pre-Blended |
| Taste & Texture | Freshest. Tastes just like a freshly made smoothie. | Good, but texture can change slightly. Often requires re-blending. |
| Convenience | Good. Requires blending each day. | Excellent. Truly grab-and-go (after thawing). |
| Noise Factor | Noisy. You have to run the blender every morning. | Silent. No blender noise in the morning. |
| Flexibility | High. Can change liquid or add fresh ingredients daily. | Low. The smoothie is already made. |
| Best For | Smoothie purists who want the best texture & taste. | Those with very early mornings or who need to be quiet. |
A Masterclass in Method 1: Perfecting Your Freezer Smoothie Packs
This is the most popular method for a reason – it delivers the best results with a little bit of daily effort.
The Anatomy of a Flawless Smoothie Pack
- Base Fruits: Berries, banana chunks, pineapple, mango. Use frozen fruit to start, or freeze fresh.
- Greens: A large handful of fresh spinach or kale.
- Healthy Fats (optional): Avocado chunks, a tablespoon of chia seeds or flaxseed meal.
- Protein & Boosters: A scoop of your favorite protein powder, collagen peptides, or other powdered supplements.
A Step-by-Step Guide to Assembling Your Packs Like a Pro
- Choose Your Recipes: Decide on 1-3 different smoothie recipes for the week to keep things interesting.
- Prep Your Ingredients: Wash and chop all fresh fruits and vegetables.
- Set Up an Assembly Line: Lay out your bags or containers and all your ingredients.
- Portion and Layer: Add your desired amount of each solid ingredient to each bag. A good layering tip: place leafy greens at the bottom of the bag to provide a cushion for more delicate fruits.
- Seal and Label: Squeeze as much air as possible out of the bags to prevent freezer burn. Label each bag with the smoothie name/contents and the date.
- Freeze: Lay the packs flat in your freezer until solid, then you can store them upright like files to save space.
- To Make: Dump one pack into your blender, add 1-1.5 cups of your preferred liquid (milk, water, etc.), and blend until smooth.
The Best Gear for Freezer Packs
- Reusable Silicone Bags: Eco-friendly, durable, and easy to wash.
- Freezer-Safe Ziploc Bags: A cost-effective and widely available option.
- Vacuum Sealer: The ultimate tool for preventing freezer burn and keeping packs fresh for months.
A Masterclass in Method 2: Perfecting Pre-Blended Frozen Smoothies
This method is the pinnacle of convenience.
Crafting a “Freezer-Friendly” Blend for Optimal Texture
Some smoothies freeze better than others. Aim for smoothies that are naturally very creamy.
- Good Ingredients: Banana, avocado, nut butters, yogurt, and full-fat coconut milk all freeze and thaw well.
- Ingredients to Be Cautious With: Smoothies with a very high water content (like those heavy on cucumber or celery) can become quite icy when frozen.
A Step-by-Step Guide to Freezing Blended Smoothies
- Make Your Smoothie: Prepare a large batch of your chosen smoothie. You might want to make it slightly thicker than you’d normally drink it.
- Portion into Containers: Pour the smoothie into individual, freezer-safe containers.
- LEAVE HEADSPACE! This is critical, especially with glass jars. Liquids expand when they freeze. Leave at least 1-2 inches of space at the top to prevent cracking.
- Seal, Label, Freeze: Seal tightly, label with the contents and date, and place upright in the freezer.
- To Enjoy: The best method is to transfer a container to the refrigerator the night before to thaw. In the morning, shake it vigorously. For the best texture, give it a quick 15-second re-blend.
The Best Gear for Pre-Blended Smoothies
- Wide-Mouth Mason Jars: Reusable and great for grab-and-go, but be sure to use freezer-safe versions and leave headspace.
- Silicone Molds (like Souper Cubes®): Freeze in perfect portions, then pop out the frozen blocks and store them in a larger bag. Thaw a block in a jar.
Pro-Tips for a Successful Week of Smoothie Meal Prep
- Plan Your Week: Don’t try to prep randomly. Choose your recipes ahead of time so you can create an efficient shopping list.
- Dedicate a “Prep Hour”: Set aside one hour on Sunday afternoon. Put on some music or a podcast and get into a rhythm.
- Freeze Your Liquids: To make your “Ready-to-Blend” packs even more efficient, freeze your liquid base (like almond milk or coconut water) in ice cube trays. In the morning, just add the pack and a few liquid cubes to the blender – no measuring needed!
- Write Instructions on the Bag: For freezer packs, write the type and amount of liquid needed directly on the label (e.g., “Add 1 cup almond milk”).
5 Prep-Friendly Smoothie Pack “Recipes” to Kickstart Your Week
For each recipe, place all solid ingredients into a freezer bag. When ready, add to blender with 1-1.5 cups of your chosen liquid (e.g., water, almond milk).
1. The Green Energy Booster Pack
- 1 large handful spinach
- 1/2 banana, sliced
- 1/2 green apple, chopped
- 1/2 cup pineapple chunks
- 1 tbsp chia seeds
2. The Berry Antioxidant Power Pack
- 1 cup mixed frozen berries (strawberries, blueberries, raspberries)
- 1 tbsp flaxseed meal
- 1 scoop collagen or unflavored protein powder (optional)
3. The Chocolate Peanut Butter Protein Pack
- 1 frozen banana, sliced
- 1-2 tbsp peanut butter (or powdered PB)
- 1 tbsp cocoa or cacao powder
- 1 scoop of chocolate protein powder
4. The Tropical Sunshine Pack
- 1/2 cup mango chunks
- 1/2 cup pineapple chunks
- 1/4 cup shredded unsweetened coconut
- 1 tbsp hemp hearts
5. The Autumn Spice Delight Pack (Perfect for September!)
- 1/2 cup pumpkin puree (Freeze in an ice cube tray first)
- 1/2 banana, sliced
- 1 tbsp almond butter
- 1/2 tsp pumpkin pie spice
- 1/4 cup rolled oats

All Your Smoothie Meal Prep Questions Answered (Expanded FAQ)
Q: How long do freezer smoothie packs last?
A: When sealed well with most air removed, they last for at least 3 months in the freezer with excellent quality.
Q: Is it better to use fresh or frozen fruit for my packs?
A: You can use either! If using fresh fruit, wash, chop, and pat it dry before freezing. Using already-frozen fruit can be a great time-saver.
Q: Do the greens get slimy when I make a freezer pack?
A: Not if they are fresh and dry when you add them. They freeze perfectly and blend up beautifully from frozen.
Q: Can I put yogurt or avocado in a freezer pack?
A: Yes! You can freeze Greek yogurt in ice cube trays and add a cube to your pack. You can also add chunks of fresh, ripe avocado
Q: Is one method healthier than the other?
A: Both methods are incredibly healthy. Arguably, the “Ready-to-Blend” freezer packs might have a slight edge in nutrient preservation since the ingredients are frozen whole and blended just before consumption, minimizing oxidation. However, the difference is likely negligible for most people. The best method is the one you will consistently use!
Conclusion: Your Journey to an Effortless Healthy Week Starts Now
The power to transform your hectic mornings and elevate your health goals lies right in your freezer. By mastering how to meal prep smoothies for a full week, you’re not just organizing ingredients; you’re investing in your future self. You’re choosing consistency over chaos, health over haste, and deliciousness over last-minute decisions. Whether you prefer the fresh-blended perfection of freezer packs or the unparalleled convenience of pre-blended portions, you are now fully equipped with the strategies, recipes, and troubleshooting knowledge to succeed.
So, set aside that hour this weekend. Put on your favorite music, lay out your ingredients, and enjoy the simple, satisfying process of preparing a week of vibrant, nourishing smoothies. Your future self will thank you.
Quick Guide: The Easiest Way to Meal Prep Smoothies (Freezer Packs)
This guide summarizes the most popular and effective method for smoothie meal prep.
- Course: Meal Prep, Breakfast, Snack
- Cuisine: Healthy, Universal
- Prep Time: 20-30 minutes for a week’s worth of packs
- Cook/Blend Time: 1-2 minutes per smoothie
Equipment You’ll Need
- Freezer-safe bags (reusable silicone or Ziploc)
- Measuring cups & spoons
- Knife & cutting board
- Permanent marker for labeling
Base “Recipe” for One Smoothie Pack
- 1 to 1.5 cups Fruit (e.g., mixed berries, banana, pineapple)
- 1 large handful Greens (e.g., spinach, kale)
- 1-2 tbsp Booster (e.g., chia seeds, flaxseed meal, hemp hearts, protein powder, nut butter)
Instructions for Prepping
- Prep Ingredients: Wash and chop any fresh fruits or vegetables. Pat greens dry.
- Set Up Assembly Line: Lay out your freezer bags and all your portioned ingredients.
- Fill the Bags: For each bag, add your chosen combination of greens, fruits, and boosters.
- Remove Air & Seal: Squeeze as much air out of each bag as you can to prevent freezer burn, then seal it tightly.
- Label & Date: Clearly write the smoothie’s contents and the date on the outside of the bag. It’s also helpful to write the liquid you plan to add (e.g., “Add 1 cup almond milk”).
- Freeze: Lay the bags flat in the freezer until they are solid. Once frozen, you can stand them up like files to save space. They’ll last for up to 3 months.
Instructions for Making the Smoothie
- Grab a Pack: Take one smoothie pack from the freezer.
- Add to Blender: Empty the entire contents of the pack into your blender.
- Add Liquid: Pour in 1 to 1.5 cups of your preferred liquid (e.g., water, milk, coconut water).
- Blend & Enjoy: Blend on high speed for 60-90 seconds until completely smooth and creamy. Pour into a glass and enjoy immediately.